The gridstackR package allows users to easily create Dashboards with gridstack.js functionalities
‘gridstack.js is […] designed to help developers create beautiful draggable, resizable, responsive […] layouts with just a few lines of code’
You can install the development version from GitHub with:
# install.packages("devtools")
devtools::install_github("petergandenberger/gridstackeR")In the example below we add gridstackR to the basic shiny application ‘Old Faithful Geyser’. The plot can now be dynamically resized and the position for both, the plot and the slider, can be changed using simple drag&drop.
library(shiny)
library(gridstackeR)
ui <- fluidPage(
  grid_stack(
    grid_stack_item(
      h = 4, w = 4, id = "plot_container", style = "overflow:hidden",
      shinydashboard::box(
        title = "Histogram", status = "primary", solidHeader = TRUE,  width = 12, height = "100%",
        plotOutput("plot", height = "auto")
      )
    ),
    grid_stack_item(
      h = 3, w = 4, minH = 3, maxH = 3, id = "slider", style = "overflow:hidden",
      shinydashboard::box(
        title = "Inputs", status = "warning", solidHeader = TRUE, width = 12, height = "100%",
        sliderInput("slider", "Slider input:", 1, 100, 50)
      )
    )
  )
)

server <- function(input, output) {
  output$plot <- renderPlot({
    x    <- faithful$waiting
    bins <- seq(min(x), max(x), length.out = input$slider + 1)

    hist(
      x, breaks = bins, col = "#75AADB", border = "white",
      xlab = "Waiting time to next eruption (in mins)",
      main = "Histogram of waiting times"
    )
  },
  # set the height according to the container height (minus the margins)
  height = function() {
    min_height <- 150
    margin <- 80
    max(input$plot_container_height - margin, min_height)
  })
}

shinyApp(ui, server)In the ui.R file, create a grid using
grid_stack(...) and place grid-stack-items inside using
grid_stack_item(...).
Specify options like height, width, x-, y-position as well. Check the gridstack.js documentation for a full list of options.
The ui.R file might contain something like the
following.
grid_stack(
  grid_stack_item(
    h = 4, w = 4, id = "plot_container", style = "overflow:hidden",
    shinydashboard::box(
      title = "Histogram", status = "primary", solidHeader = TRUE,  width = 12, height = "100%",
      plotOutput("plot", height = "auto")
    )
  )
)Elements inside grid-stack-item might not change their
height automatically.
The following example shows how the height of the plot can be set
dynamically using the <id>_height callback
Note: the plot_container_height references the height of
the id = "plot_container" created in the ui.R
example above.
output$plot <- renderPlot({
    x    <- faithful$waiting
    bins <- seq(min(x), max(x), length.out = input$slider + 1)

    hist(
      x, breaks = bins, col = "#75AADB", border = "white",
      xlab = "Waiting time to next eruption (in mins)",
      main = "Histogram of waiting times"
    )
  },
  # set the height according to the container height (minus the margins)
  height = function() {
    min_height <- 150
    margin <- 80
    max(input$plot_container_height - margin, min_height)
  }
)The height for a DT::dataTableOutput can be set as in
the following example.
ui.R
grid_stack_item(
        w = 4, h = 10, x = 0, y = 0, id =  "c_table",
        DT::dataTableOutput("mytable")
      )
server.R
output$mytable <- DT::renderDataTable({
    DT::datatable(mtcars, options = list(
      # set the height according to the container height (minus the margins)
      scrollY = max(input$c_table_height, 200) - 110, paging = FALSE
      )
    )
})The height for a echarts4r::echarts4rOutput can easily
be set using the height="100%" option.
ui.R
grid_stack_item(
 w = 5, h = 5, x = 7, y = 0, id = "c_plot",
 echarts4rOutput(outputId =  "plot", height = "100%")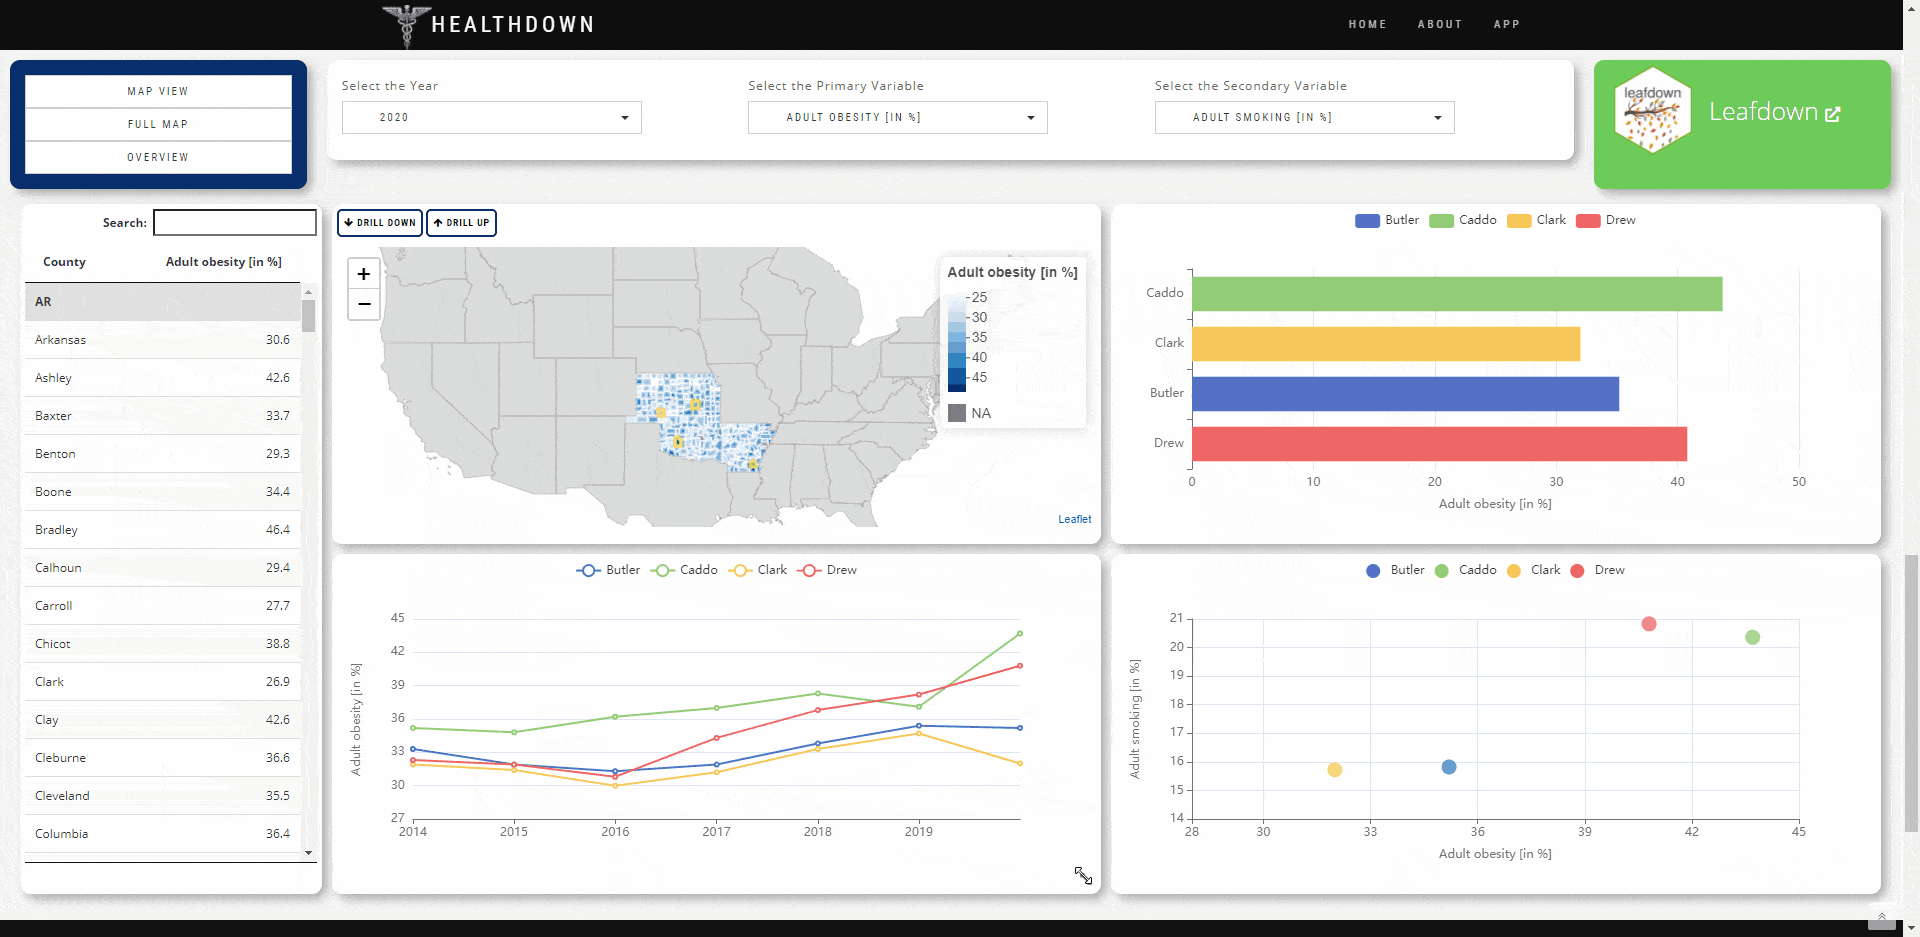
)It is also possible to load predefined Layouts. This is demonstrated in the healthdown example above.
ui.R
server.R
# do this inside of e.g. an 'observeEvent' of an 'actionButton'
new_layout <- '[
    {"id": "c_plot", "options":{"x": 0,"y": 0,"w": 2, "h": 10}},
    {"id": "c_map", "options":{"x": 2,"y": 0,"w": 5, "h": 5}}
  ]'
js$load_grid_layout(new_layout)